4 ways to gift a PDF pattern + printable embroidered gift tags

Patterns are ideal gifts for embroiderers, but PDFs aren’t the most obviously giftable items. They can be, though.

Here are four ways to wrap printed PDF patterns to make a thoughtful gift for embroidery friends and family members a good-looking one, too. You'll have to forward this post to potential gift givers if you're the embroiderer, or just enjoy making the embroidered gift tags.

1.    Get creative with a simple white envelope

Print your PDF pattern purchase and seal it in a white envelope. Then get creative with cord, braid, string, lace, washi tape… whatever you have to hand. I dug into my haberdashery box, but anything that can be tied around the envelope, stuck to it or used to draw on it can be used as decoration. Add a tag to the string before you knot it or stick one to the front of the envelope.

2.    Roll up a pattern as a stocking filler

Cut a strip of paper – plain, patterned or to match your wrapping paper. Print your PDF pattern and roll it up fairly tightly so you have a long, thin tube that'll slide easily into a Christmas stocking. Wrap the strip of paper around the rolled up pattern and secure it with a piece of cellotape to help the tube keep its shape. Cut a rectangle of wrapping paper and wrap it around the rolled up pattern; push the excess at either end inside the pattern tube and tie a piece of cord, thread, braid or whatever you’ve chosen around the tube to hold it closed. Thread a tag on to the string before you knot it. 

3.    Add threads and wrap as a Christmas cracker

Roll your printed PDF pattern up and use a strip of paper and a piece of cellotape to hold it in place; it should be about the same circumference as a Christmas cracker. Place skeins of embroidery thread (check the pattern for which colours are required) inside the rolled up pattern. Cut a rectangle of wrapping paper and roll the pattern up inside it. Then scrunch the ends closed and tie with braid so the gift resembles a cracker. Either thread a tag on to the braid at one end before tying it or attach one to the centre of the "cracker". 

4.    Create a kit with fabric, threads, needles and a hoop

Look for a flat box – preferably one big enough that you only have to fold the pattern once, if at all. Place the printed PDF pattern in the bottom of the box and add a piece of fabric, skeins of thread, needles and an embroidery hoop. Check the pattern requirements for the type and size of fabric, thread colours and needle requirements. A four or five-inch embroidery hoop is a good option. The nice thing about making a kit out of a PDF pattern is that the recipient can start on the project right away. 

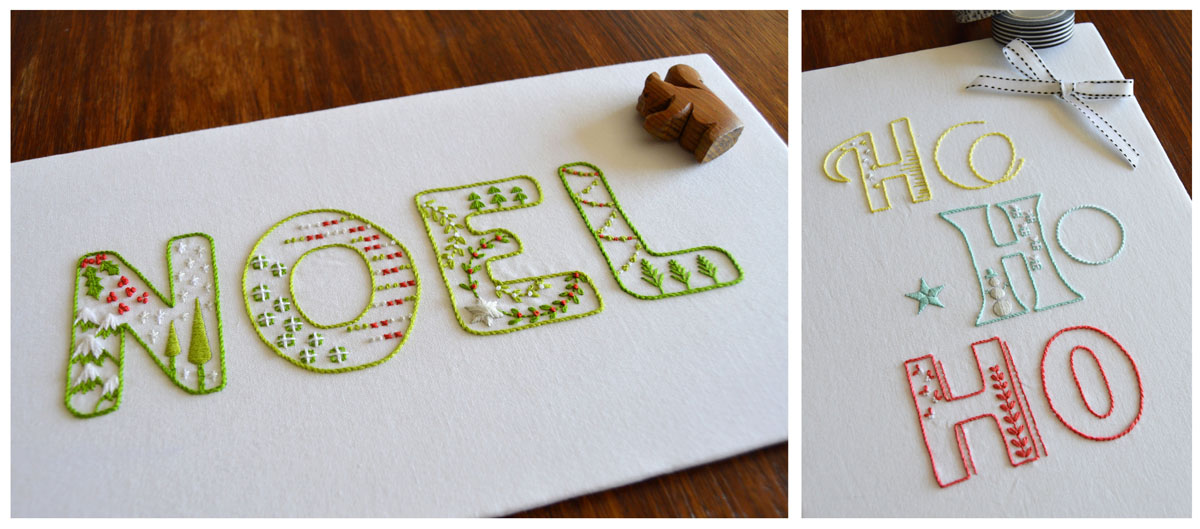
The gift tags are available to download as a printable in four different colourways – green, red, yellow and B&W – with the option to add the embroidery or leave the tags plain. The download includes instructions for the embroidery.

EmbroideredGiftTags_KellyFletcher.jpg

Cyber Monday sale: 25% off everything in my Etsy shop

Cyber Monday is around the corner and I’ll be running my 25% off sale again this year. That’s 25% off everything in my Etsy shop.

The sale starts on the evening of Sunday 27 November and ends on the morning of Tuesday 29 November (South Africa time, GMT+2). This’ll give everyone a chance to shop on Monday, irrespective of time zone.

Add all the embroidery patterns you want to your cart and then use the coupon code KFNDCYBERMONDAY2016 when you checkout to redeem your discount. 

That’s it. Happy shopping!

Christmas greetings: Festive Noel and Ho Ho Ho embroidery patterns

My workspace over the past year or so has been filled with scribbled letters, sketched alphabets and pencilled stitch ideas. These slowly but surely morphed into embroidered hand lettering and typography, monograms and alphabets, which in turn became patterns for my online shops.

So it didn’t surprise me when I was drawn to an idea from a few years back that involved festive words filled with cheer for this year’s Christmas patterns. 

There are two patterns: Noel and Ho Ho Ho. 

Noel is slightly more traditional with its red, green, silver-grey and white embroidery. But I’ve used fresh, crisp shades of these Christmassy colours to keep the look contemporary. The stitches making up the details inside each letter are interesting, if slightly more involved, but the design doesn’t take all that long to embroider, with just four filled letters.

Ho Ho Ho was designed with beginner embroiderers in mind, but it’s also a good pattern for those looking for a quick project to finish in a day. There are fewer stitches, although enough of a variety to keep the embroidery interesting to do. And I’ve gone with less conventional thread colours for a different spin on Christmas.

Noel would look good framed on a mantelpiece alongside carved wooden reindeer or pinecones and I can picture Ho Ho Ho embroidered on a Christmas stocking. The patterns are available on Etsy and Craftsy.

Letterpress, the embroidered version

Letterpress, an embroidered alphabet inspired by old letterpress letters, is finally here.

Months in the making, this turned into rather a challenging design to embroider - a balancing act between colour and weighting.

I wanted to use bold, quite deep colours and limited the palette to just six thread colours. This meant quite a bit of chopping and changing as I stitched, to keep the colour distribution even.

The other aspect that made it tricky was weighting. The idea was to fill or part-fill quite a few of the letters to add substance to the design and bring in some new stitch ideas, but I had to be careful not to allow the overall design to appear lopsided. It became a case of evenly distributing the more "solid" letters among the more "open" letters and colour played a big part in this, too.

The pattern is available on Etsy and Craftsy

Arrow Alphabet, a typographic embroidery pattern

The journey my Arrow Alphabet design took was a long one, beginning with the arrow design on one of the pouches in the pattern.

It was initially an embroidered appliqué design that I put forward as part of an editorial project that didn't pan out. I liked it though, and kept the design on file for more than a year. While working on another editorial project, I experimented with bands of satin stitch. I loved the way it turned out and knew the idea would work equally well for the arrow design I'd filed away.

ArrowAlphabet_Sketch_KellyFletcher.jpg

I'd been working on embroidered alphabets on and off and with arrows on the brain, it didn't take long to match embroidery stitches to arrow parts. I liked the way the letters were quite different to the ones I'd embroidered before - skinny and almost delicate - and so went ahead with the design to complement my other alphabets.

A zippered pouch was the perfect shape for the large arrow design and, as I was in need of some, I made a second one to see how the alphabet worked when customised, in this case embroidering my initials. Hopefully you'll agree they turned out well, despite a glitch in the sewing phase that sent me back to the drawing board: I was keen to try out a different way of making pouches that I thought might result in a neater finish, which worked well in the end. 

The smaller pouch is the perfect size for pens, pencils and other stationery and the larger, arrow pouch can comfortably hold a sketch or stitch book up to A5 in size as well as needlework paraphernalia - a nice way to take your work on holiday or to a class. 

The thread colours of the embroidered alphabet were chosen in conjunction with the natural linen fabric of the pouches, which I've lined with matching light yellow and taupe cotton fabric. And the white zips add an element of freshness to the finished pouches.

The patterns are available on Etsy and Craftsy.